Let’s talk about the endless possibilities that lie within our very own households – can we use everyday tools for welding? From pliers to hammers, the question arises whether these seemingly ordinary objects have the power to wield together metals. Join us as we uncover the truth behind this practical yet unconventional approach to welding, and discover how you can tap into your resourcefulness to tackle your next welding project.
Review contents
Overview
What is welding?
Welding is a process that involves joining two or more pieces of metal together to form a solid bond. It is commonly used in construction, manufacturing, and various other industries to create and repair metal structures. Welding requires the use of heat to melt the base metal and a filler material, which is typically in the form of a welding rod or wire, to create the bond.
Why would you want to use household tools for welding?
Using household tools for welding can be a convenient and cost-effective solution for small welding projects or repairs. Most households have a variety of tools that can be repurposed for welding, eliminating the need to invest in expensive welding equipment. Additionally, if you are new to welding and want to experiment or learn the basics, using household tools can be a great starting point before diving into more specialized welding techniques.
Benefits and drawbacks of using household tools for welding
The use of household tools for welding comes with its own set of benefits and drawbacks. One of the main benefits is the cost-effectiveness, as you can save money by utilizing tools you already have. It also offers convenience and accessibility, as you don’t need to go out and purchase specialized welding equipment.
However, there are some drawbacks to consider. Household tools are not specifically designed for welding, so they may not provide the same level of precision and control as professional welding equipment. They may also have limitations in terms of power output, which can affect the quality of the weld. Additionally, using household tools for welding requires proper safety precautions, as they may not offer the same level of protection as dedicated welding equipment.
Common Household Tools for Welding
1. Vice-Grips
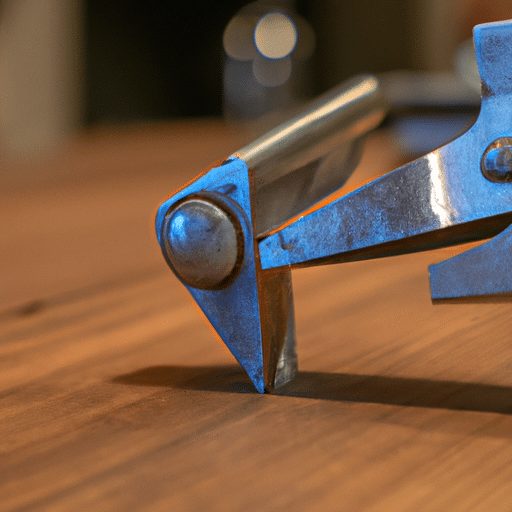
Vice-Grips, also known as locking pliers, are versatile tools that can be used for welding. They have a built-in locking mechanism that allows them to securely hold objects in place, making them suitable for clamping pieces of metal together during the welding process. Vice-Grips provide stability and help ensure accurate alignment, which is crucial for successful welding.
2. Hammer
A hammer is a common tool found in most households, and it can also be used for welding purposes. Hammering can help straighten metal or adjust its shape, which can be necessary for proper welding alignment. It is important to choose a hammer with a flat or slightly rounded face to avoid damaging the metal surface.
3. Blowtorch
A blowtorch is a valuable tool for welding as it provides a source of concentrated heat. It can be used to heat the metal, allowing for the melting of the welding rod or wire. Blowtorches come in various sizes and fuel types, such as propane or butane, and can be adjusted to control the flame intensity. When using a blowtorch for welding, it is essential to use the proper safety precautions and ensure proper ventilation to prevent the buildup of harmful fumes.
4. Angle Grinder
An angle grinder is a versatile tool that can be used for a variety of tasks, including preparing metal surfaces for welding. It is equipped with a rotating abrasive disc that can remove rust, paint, or other contaminants from the metal, ensuring a clean and smooth surface for welding. The angle grinder can also be used to cut or shape metal, making it a useful tool for welding preparation.
5. Clamps
Clamps are essential tools for holding metal pieces in place during welding. They come in different sizes and types, such as C-clamps or bar clamps, and provide stability and alignment while welding. Clamps allow for hands-free operation and ensure that the pieces remain securely in position, resulting in accurate and precise welding joints.
6. Chisel
A chisel is a cutting tool that can be used in welding for various purposes. It can be used to remove excess weld material or to create a groove or channel for the welding filler material. Choosing a chisel with a sharp and durable blade is important for achieving clean and precise cuts during the welding process.
7. Wire Brush
A wire brush is an important tool for cleaning metal surfaces before welding. It is used to remove rust, scale, dirt, or other impurities that can hinder the welding process. The wire bristles of the brush can easily reach into crevices and corners, ensuring a thorough cleaning before welding. Regularly cleaning the wire brush to remove accumulated debris is essential to maintain its effectiveness.
8. Mallet
A mallet is a hammer-like tool with a large head, often made of rubber or plastic. It is useful in welding for tasks that require a softer impact, such as shaping metal or adjusting the position of welded pieces. The mallet’s softer head helps prevent damage to the metal surface while still providing the necessary force for shaping or manipulating during the welding process.
9. Hacksaw
A hacksaw is a cutting tool that uses a fine-toothed blade to cut through metal. It can be used in welding to cut metal rods, pipes, or other pieces to the desired size. The blade of a hacksaw is replaceable, ensuring continued usability. When using a hacksaw for cutting metal, it is important to choose the appropriate blade for the type and thickness of the metal being cut.
10. Drill
A drill is a versatile tool that can be used for various tasks in welding. It is commonly used to create holes in metal, allowing for the insertion of fasteners or other components. Drills come in different sizes and types, such as handheld drills or drill presses. When using a drill for welding, it is crucial to select the right drill bit for the specific metal and hole size requirements.
Safety Considerations
1. Protective Gear
When welding with household tools, it is essential to prioritize safety by wearing the appropriate protective gear. This includes a welding helmet or face shield to protect the eyes and face from sparks and ultraviolet (UV) radiation. Welding gloves should be worn to protect the hands from heat and potential burns. Long-sleeved clothing and long pants made of flame-resistant material are recommended to protect the body from sparks or molten metal.
2. Ventilation
Proper ventilation is crucial when welding with household tools, as the process can generate harmful fumes and gases. Working in a well-ventilated area or using an exhaust system can help remove these fumes and gases, ensuring a safer work environment. It is also important to avoid welding in confined spaces without proper ventilation, as the accumulation of fumes can be extremely dangerous.
3. Fire Hazards
Welding involves the use of intense heat and sparks, which can pose a fire hazard. Clearing the work area of flammable materials, such as paper, fabric, or chemicals, is essential to minimize the risk of fire. It is also important to have a fire extinguisher nearby and to know how to use it in case of an emergency.
4. Electrical Safety
When using household tools for welding, electrical safety must be considered. Ensure that the power source being used is suitable for the tools, and follow proper wiring and grounding procedures. It is crucial to avoid overloading electrical circuits and to use electrical cords that are in good condition. If unsure about electrical safety, it is recommended to consult a professional electrician.
Steps for Welding with Household Tools
1. Cleaning the Metal Surface
Before beginning any welding project, it is important to thoroughly clean the metal surface. Use a wire brush or an angle grinder with a wire brush attachment to remove any rust, scale, or dirt. Cleaning the metal surface ensures better adhesion and a stronger weld.
2. Preparing the Materials
Once the metal surface is clean, prepare the materials you will be welding. Cut the metal to the desired size using a hacksaw or an angle grinder with a cutting disc. Ensure that the pieces fit together properly and make any necessary adjustments or modifications.
3. Setting Up the Work Area
Create a safe and well-organized work area for welding. Clear any flammable materials from the vicinity, and ensure proper ventilation by working in a well-ventilated space or using an exhaust system. Set up a sturdy workbench or table to hold the materials securely.
4. Safety Precautions
Before beginning the welding process, ensure you are wearing the appropriate protective gear, including a welding helmet or face shield, welding gloves, and flame-resistant clothing. Make sure the work area is clear of any potential fire hazards, and have a fire extinguisher nearby. Double-check the electrical connections and ensure proper grounding.
5. Start the Welding Process
Using the appropriate household tool for welding, heat the metal surface until it is hot enough to melt the welding rod or wire. Apply the welding rod or wire to the joint, allowing it to melt and form a bond with the base metal. Move the tool along the joint, ensuring even penetration and a consistent bead. After completing the weld, allow it to cool before handling or further work.
Projects You Can Do
1. Repairing Metal Furniture
Using household tools for welding can be a great way to repair damaged metal furniture. Whether it’s a broken chair leg or a cracked table frame, welding can help restore the functionality and aesthetics of the piece. By employing household tools such as clamps, angle grinders, and blowtorches, you can effectively fix the damaged areas and reinforce the structure of the furniture.
2. Creating Decorative Metal Art
Welding allows for the creation of unique and personalized metal art pieces for your home or garden. With household tools like wire brushes, chisels, and blowtorches, you can shape and join metal pieces to bring your artistic vision to life. From wall hangings to sculptures, the possibilities are endless when using your creativity and household tools for welding.
3. Fixing Metal Gates or Fences
Household tools can also be utilized to repair metal gates or fences. Whether it’s a broken latch or a damaged section of the fence, welding can provide a strong and durable solution. By using clamps, angle grinders, and blowtorches, you can mend the broken parts and restore the security and functionality of your gates or fences.
4. Modifying Automotive Parts
Welding with household tools can be handy for modifying or customizing automotive parts. From reinforcing brackets to creating custom exhaust systems, household tools such as angle grinders, clamps, and blowtorches can be used to shape and join metal components. Modify and upgrade your vehicle’s performance or aesthetics with the versatility of household tools for welding.
5. Crafting Metal Sculptures
Welding offers endless possibilities when it comes to crafting metal sculptures. By using household tools like wire brushes, chisels, and blowtorches, you can shape and weld metal pieces together to create unique and eye-catching sculptures. Let your imagination run wild as you bring various shapes and forms to life with the art of welding.
In conclusion, while there are certain limitations and considerations when using household tools for welding, they can still serve as valuable resources for small projects or repairs. By understanding the benefits and drawbacks, acquiring the necessary safety gear, and following proper procedures, you can successfully utilize household tools for welding. From repairing furniture to creating intricate metal art, the possibilities are vast when you tap into the potential of household tools for welding. So, roll up your sleeves, gather your tools, and dive into the fascinating world of welding with household tools!


